High-performance and highly available VPS/VDS with automatic installation and full root access to the OS. The ordered resources are guaranteed to be reserved for you.
Fortify your operational continuity with our resilient disaster recovery solutions, ensuring swift recovery and minimal downtime in the face of unforeseen challenges.
We will start by briefly explaining why Lenovo IMM is so important and why it is the first thing you should do after purchasing a Lenovo server.
So, all system administrators (SysAdmins) sooner or later encounter critical hardware failures. The problems can be software or hardware — it doesn't matter. The important thing is that the equipment does not respond, and there is no remote access through the management console and GUI. The solution is simple — physically, via a button, reboot the server and then look for the problem to prevent it from happening again.
This is not a problem if you have several servers huffing and puffing in a neighboring server room. But when the infrastructure is geographically distributed (up to different districts, cities and countries), and servers with fifty, the administration becomes very complicated. Yes, you can hire on-site sysadmins, but it is more expensive and longer than remote problem solving.
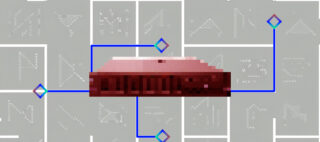
With configured Lenovo IMM you can collect information from sensors, adjust fan speed, reboot, shut down the server in case of serious errors, cold start, manage drives and reinstall the operating system. Full low-level access and remote management as if the server were right in front of you.
A huge plus of IMM is that it is independent of the underlying server systems. You only need standby power on the motherboard and a network connection. And preconfiguration, which takes 5-10 minutes. And this time will pay for itself after the first failure.
IMM reduces personnel costs, speeds up troubleshooting, and simplifies maintenance of large infrastructures.
IBM and Lenovo servers, why are they so similar?
Lenovo is the world's largest manufacturer of computers as well as server hardware. But this was not always the case: the company acquired IBM's x86 server business in 2014 for 2.1 billion dollars and is actively using previous developments, including IMM. The reason for the sale of IBM's server business was the company's strategic reorientation towards the development of cloud services and software technologies, as well as the desire to cut costs and focus on more profitable areas.
Today, Lenovo is successfully developing and growing the IBM x86 server business:
Product Line Expansion: Lenovo continues to develop and expand the IBM server lineup by adding new models and features. This includes the launch of the ThinkSystem brand, which includes servers optimized for artificial intelligence and other high-performance computing workloads.
Investments in research and development: Lenovo is investing heavily in research and development to improve the performance, efficiency and reliability of its servers. This includes developing new cooling technologies and optimizing servers for cloud computing and other modern workloads.
Expansion into new markets: Lenovo has expanded its IBM server business into new markets, including China and other parts of Asia where the company has a strong presence. This has helped increase the reach of the IBM server brand and drive growth in new markets.
Focus on customer needs: Lenovo focused on customer satisfaction by offering customized server solutions and providing superior customer service. This has helped build a loyal customer base and drive sales growth.
What is Lenovo's IMM and how to configure it
IBM has developed the first generation of IMM (Integrated Management Module) technology for remote server management. It is a hardware and software package and the de facto miniature computer in a server. IMM is based on several other solutions including IPMI, BMC, RSA-II, Super I/O controller and Video controller. After the takeover, development was continued by Lenovo. As of 2023, the latest version is IMM 2 (4.70).
IMM 2 provides access to the server over a WAN or LAN. It can be accessed either through a compatible web browser or through a local management console.
IMM 2 allows administrators to accomplish the following tasks:
Viewing status information about the server and its components such as processors, memory, drives, fans, etc.
Server power management, including the ability to remotely power on, power off, and reboot the server.
Managing virtual machines and operating systems on the server.
Remote server management security, including data encryption, user authentication and access control.
And much more.
The first designs for remote management of IBM servers were discrete. The company produced the RSA-II PCI card, which required a special cable to connect to the motherboard. However, when RSA-IIs appeared on the aftermarket, it became clear that wires were scarce. As a result, prices soared higher than the RSA-II cards themselves.
RSA-II and IBM CABLE FOR RSA II. The second was more expensive on the aftermarket.
The first version of IMM came out with IBM iDataPlex M2, M3 servers, as well as with System M2, M3 and X5. Unlike previous discrete cards, the new IMM was soldered directly onto the motherboard as an SoC (System-on-a-Chip). However, the System x3755 M3 server had a different controller from a Taiwanese company, the Aspeed AST-2050. IBM was obviously experimenting to find an optimal solution. But the solution did not take root, and now Aspeed AST-2050 is found only in budget servers from Supermicro.
IMM chip soldered on the motherboard.
Aspeed AST-2050 chip in a Supermicro server.
Most IBM server models required the installation of a VMK (Virtual Media Key) to activate a paid license. This is a small hardware micro board in a colored case with the simplest connector. This was IBM's way of fighting piracy, but the solution was not as successful as, for example, key generators in HP servers. Many sysadmins still remember VMK unflatteringly.
Virtual Media Key.
With the advent of IMM 2, it is possible to upgrade to paid licenses without any hardware modifications. This has made life much easier for technicians. There is no need to stop the server, remove the cover and look for a VMK connector.
Well, since we have touched upon the topic of paid IMM licenses, it's time to take a closer look at this issue.
IMM license levels and server models
IMM 1 is obsolete and used only in older IBM servers, so let's talk about the current version for 2023 - IMM 2.
So, all compatible Lenovo servers come with a basic IMM 2 "Basic" license and limited functionality. But some of the higher-end server models come with a "Standard" or "Advanced" license out of the box. Of course, you can upgrade to the extended "Standard" and "Advanced" licenses, but for that you need to buy an electronic or paper certificate with a key. Note that the license is perpetual and valid for one server only.
Key
License level
90Y3900
Integrated Management Module Standard Upgrade
90Y3901
Integrated Management Module Advanced Upgrade (standard modernization is required, 90Y3900)
MM 2 levels by model:
Серверы
IMM 2 Basic
IMM 2 Standard
IMM 2 Advanced
System x3100 M4
Out of the box
Need a key90Y3900
Need a key 90Y3901
System x3100 M5
Out of the box
Need a key 90Y3901
System x3250 M4
Out of the box
Need a key 90Y3900
Need a key 90Y3901
System x3250 M5
Out of the box
Need a key 90Y3901
System x3250 M6
Out of the box
Need a key 90Y3901
System x3300 M4
Out of the box
Need a key 90Y3901
System x3500 M4
Out of the box
Need a key 90Y3901
System x3500 M5
Out of the box
Need a key 90Y3901
System x3530 M4
Out of the box
Need a key 90Y3901
System x3550 M4
Out of the box
Need a key 90Y3901
System x3550 M5
Out of the box
Need a key 90Y3901
System x3630 M4
Out of the box
Нужен ключ 90Y3901
System x3650 M4
Из коробки
Need a key 90Y3901
System x3650 M4 BD
Out of the box
Need a key 90Y3901
System x3650 M4 HD
Out of the box
Need a key 90Y3901
System x3650 M5
Out of the box
System x3750 M4
Out of the box
System x3850 X6
Out of the box
System x3950 X6
Out of the box
iDataPlex dx360 M4
Out of the box
Need a key 90Y3901
NeXtScale nx360 M4
Out of the box
Need a key 90Y3900
Need a key 90Y3901
NeXtScale nx360 M5
Out of the box
Need a key 90Y3900
Need a key 90Y3901
Some Lenovo server models have FoD (Features on Demand) blocked RJ-45 ports. Once the license is activated, they are available for use.
Differences of IMM 2 licenses
IMM 2 Basic is the basic level of IMM 2 that includes basic remote server management functions such as monitoring server status, turning the server on and off, and receiving information about server events.
IMM 2 Standard is the advanced level of IMM 2, which includes all IMM 2 Basic features plus additional features such as remote console access, power management, and virtual machine management.
IMM 2 Advanced is the highest level of IMM 2, which includes all IMM 2 Standard features as well as additional features such as virtualization features, performance management, and network management.
It's worth noting that the more advanced license includes all the features of previous licenses. A free 90-day test period is also available to familiarize yourself with the functionality. Take note: the trial can be used for initial configuration of IMM.
IMM 2 Basic, IMM 2 Standard, and IMM 2 Advanced functionality may vary depending on the specific Lenovo server model. It is recommended that you check the available IMM 2 features for your specific server model on the manufacturer's website.
• Industry standard interfaces and protocols; • Compliance with the IPMI specification; • CIM (Common Information Model) support); • PFA Support (Advanced Predictive Failure Analysis); • Continuous health monitoring of the system; • Choice of dedicated or combined Ethernet port; • Supports secure SSH text console access (with AES encryption); • DNS and DHCP support;• Built-in DSA (Dynamic System Analysis) cryptographic algorithm; • LAN over USB for in-cavity communication with the IMM; • Supports SOL (Serial over LAN) mechanism; • Console redirection; • Remote firmware update; • Remote Setup via ASU (Advanced Settings Utility); • And others.
• Secure web interface for server administrator; • Remote power management; • Access to VPD (Vital Product Data) servers; • PFA support (Predictive Failure Analysis); • Energy management; • Automate notifications and alerts; • E-mail notifications; • Supports system logging; • Managing the authority of administrators.
• User experience similar to physical presence (Remote presence). Including remote control via Java or Activex; • Connect up to four remote administrators simultaneously; • Accessing the system error screen via the web interface; • Supports virtual media technology, allowing you to remotely connect disks, USB drives and disk images; • For servers with an SD Media adapter installed, you can configure volumes for use via IMM.
The Basic license has limited functionality that is insufficient for some work tasks, such as flipping drives or configuring administrator rights. Therefore, it is recommended that you select at least a Standard license.
How to configure Lenovo IMM 2 uniquely: what you need to know before customizing
Note! This instruction does not apply to blade servers and other BladeCenter products for which there is a special Advanced Management Module. If you need to configure IMM 2 on Lenovo Blades, use the ASU (Advanced Settings Utility).
An IP address is required to configure the IMM 2 remotely.
Typically, Lenovo servers default to a static Pv4 address of 192.168.70.125. Note that the default IPv4 address may vary depending on the server model and configuration. If 192.168.70.125 is not suitable, it is recommended that you check your server documentation to see what the default IP address is on a particular model.
IPv6 is also supported, but there is no pre-configured address. The IMM 2 IPv6 address on Lenovo servers is typically configured manually through the IMM 2 web interface or by using the ASU command line utility (Advanced Settings Utility). When configuring the IPv6 address, you must specify the server IPv6 address, subnet mask, and default gateway.
Dual Stack IPv4/IPv6 functionality is also implemented, which allows using both IPv4 and IPv6 at the same time. In this case, IMM 2 receives both IPv4 and IPv6 addresses and can use either of them for communication depending on the network configuration settings and address availability.
Read before setting up IMM2!All settings can also be done immediately via the IMM 2 web interface (192.168.70.125 default address) or locally via the command line (CLI).When configuring Lenovo servers, it is important to know that they do not start up immediately after the power cable is plugged in. You must wait a few seconds for the power button on the server to become active.Remember to configure the IMM 2 security on the Security tab. Set the administrator password and/or power-on password if required.If you have previously set the administrator password and the power-on password, you must enter the administrator password to gain full access to the server settings. If you forget the administrator password or power-on password, you can refer to your Lenovo documentation or technical support for instructions on how to reset the password.On Lenovo IMM 2 servers, the IMM 2 can use two types of network ports - Dedicated (dedicated, signed "IMM" on the chassis) and Shared. A Dedicated port is a separate network interface dedicated specifically to the IMM 2. This means that the port will not be used for other server network functions and will be dedicated entirely to server management.When you use the Dedicated port for IMM 2, you can provide better performance and security because it will not compete for bandwidth with other network services. The Shared port is used for shared access between IMM 2 and other network services on the server. This means that the port will be used for both server management and other network functions.When using a Shared port for IMM 2, there may be performance degradation due to competition for bandwidth with other network services. However, it is not necessary to use a separate physical port.
Initial configuration of the Lenovo IMM 2 using the System x Server Firmware Setup utility
Steps to initially configure the IMM 2:
Connect power and a network cable to the server.
Turn on the server and wait for The System x Server Firmware utility window to appear.
3. Once the screen prompts you with instructions, press the F1 key.
4. From the menu, go to Network Configuration: System Settings > Integrated Management Module > Network Configuration.
5. You need to configure the network connection under DHCP Control. There are 3 options to choose from: Static IP, DHCP Enabled or DHCP with Failover (default).
6. If the server is connected to the network via DHCP, specify that the IMM 2 address will be assigned automatically - "DHCP Enabled" or "DHCP with Failover". If you want to use a static IP address, specify in "Static IP" the settings: address, subnet mask and gateway.
7. Then go to the bottom and select Save Network Settings;
8. Press Esc until a window appears in which you need to select Save and Exit the Setup Utility.
9. Restart the server to apply the IMM settings 2. The changes will take effect in about one minute.
First login to the IMM 2 web interface
Enter the default or preconfigured IP address of the IMM 2 in the browser bar.
This will take you to the IMM 2 login window. In the Supported Browsers menu you can see the recommended browsers (Chrome, Safari, Firefox, etc.). For the first login you will need the standard login USERID and password PASSW0RD (note the number "0" instead of the letter "O").)
Enter your information and click Log In.
IMPORTANT: it is not safe to use a standard login and password, be sure to change the authentication settings after the first login. You can do this in the "Security" and "Users" tab in the left menu.
4. After successfully logging into the IMM 2 console, the System Status page will open, displaying the server status report. This page is the starting point for further server management. Here you can find out such information as memory status, CPU utilization, temperature, fan speed and other parameters. Various tabs and menus of IMM 2 can be used for more detailed configuration and management of the server.
To summarize the IMM 2 thesis and its configuration
IMM 2 (Integrated Management Module) is a remote management system for Lenovo servers that allows administrators to monitor and manage servers through a web interface, console, or API. It must be configured as soon as the server is commissioned.
IMM 2 includes a number of functionalities such as server health monitoring, remote power management, RAID controller configuration, virtual console and others.
IMM 2 has several licensing levels - Basic, Standard and Advanced, which provide a different set of features and functionality.
IMM 2 supports both IPv4 and IPv6 addressing and can be configured via web interface, console or ASU (Advanced Settings Utility).
Using IMM 2 simplifies the server management process and increases the efficiency and reliability of the server infrastructure.
Subscribe to our newsletter to get articles and news


 blocked RJ-45 ports of Lenivo server,")


