Linking Authentication Provider
This guide will show you how to link an external authentication provider, such as Google, to your Peerobyte account. By linking Google authentication, you will no longer need to enter your email and password every time you access the Peerobyte control panel if you are already signed in to Google.
Prerequisites
1. You must have a registered Peerobyte account. For information on how to create an account, please refer to the “Creating an Account” guide.
2. You must have a Google account that is not already linked to your Peerobyte account.
3. Your Peerobyte account should not already be linked to a Google account. To learn how to unlink an external authentication provider, see the “Unlinking Authentication Provider” guide.
Linking Google as an Authentication Provider
1. Log in to the Peerobyte control panel.
Instructions on how to log in can be found in the “Logging in to the Control Panel” guide. If your account uses two-factor authentication (2FA), the login process is described in the “Logging in to the Control Panel with 2FA” guide.
2. Click on the avatar or profile name located in the upper right corner of the Peerobyte control panel.
A dropdown menu with account-related options will appear.
3. Select the Security Settings item from the dropdown menu.
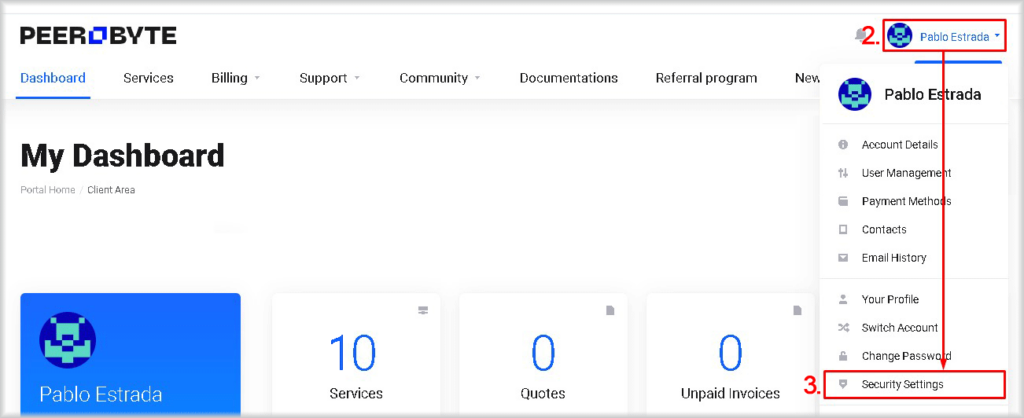
The Security Settings page will open.
4. Go to the Linked Accounts tab.
5. Click the Sign In as… button.
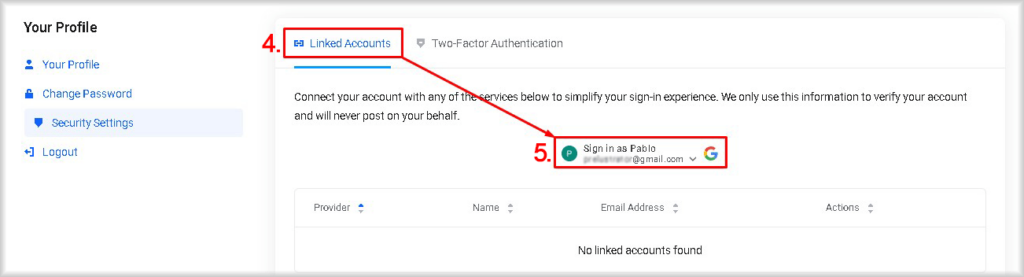
A window will appear to choose an account.
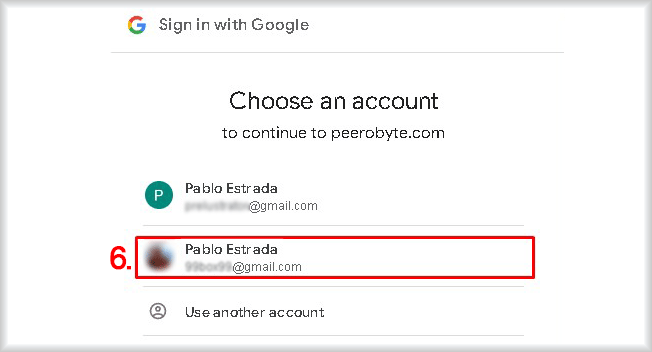
6. Select the account you want to link.
If the Google account is successfully linked, you will see a message: “Success! Your account is now linked with your Google account”, and the newly added authentication provider will be displayed.
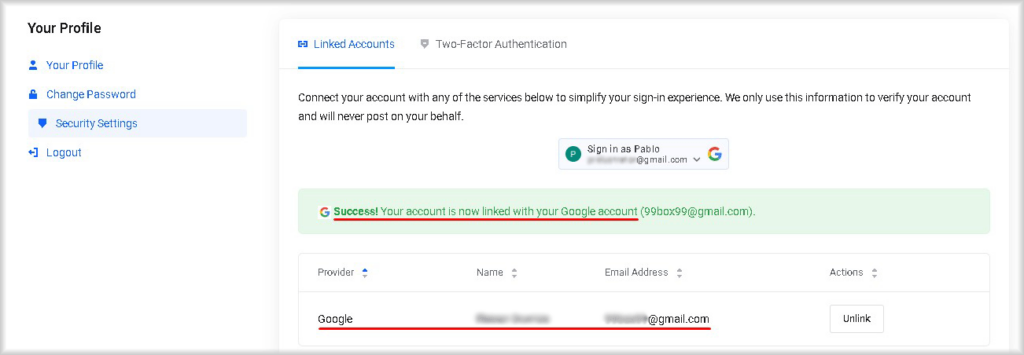
From now on, you can sign in to the Peerobyte control panel using your Google account for authentication.