How to Order a Dedicated Server
Here we will review the procedure for ordering a dedicated server.
Prerequisites
1. You must have a Peerobyte account registered according to the Instructions.
2. You must be able to pay the service by bank card or bank transfer.
3. You must log in to your account on the Peerobyte website or log in to the control panel of your account:
- a. If 2FA (Two-Factor Authentication) is not enabled, follow the Login Instructions.
- b. If 2FA is enabled, follow the Login Instructions for 2FA.
Instructions
How to Navigate to the Dedicated Server Order Page
From the Peerobyte Control Panel
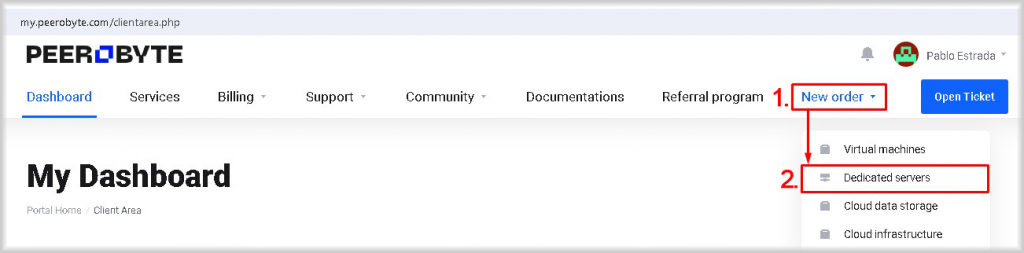
1. Select the New order item from the main menu in the Peerobyte control panel.
A dropdown menu will appear displaying the services available for order.
2. Select the Dedicated Server menu item.
You will be redirected to the Your Dedicated Server page.
From the Peerobyte Website
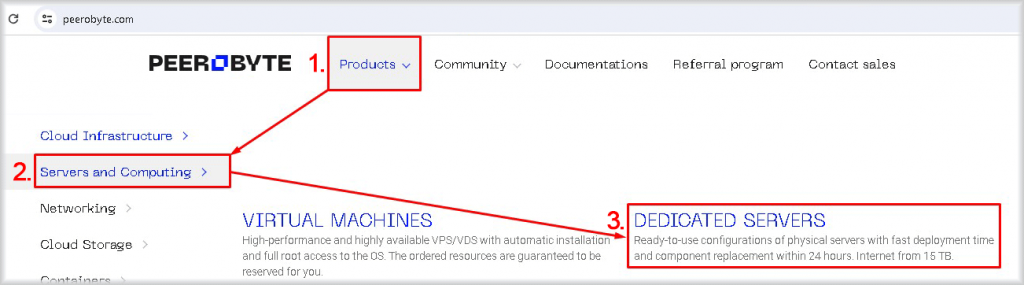
1. Select the Products item from the main menu in the Peerobyte control panel.
A dropdown menu will appear showing the product categories available for order.
2. Select the Servers and Computing menu item.
A list of products in this category will be displayed.
3. Select the Dedicated Server menu item.
You will be redirected to the Your Dedicated Server page.
Choosing the Configuration and Placing Your Order
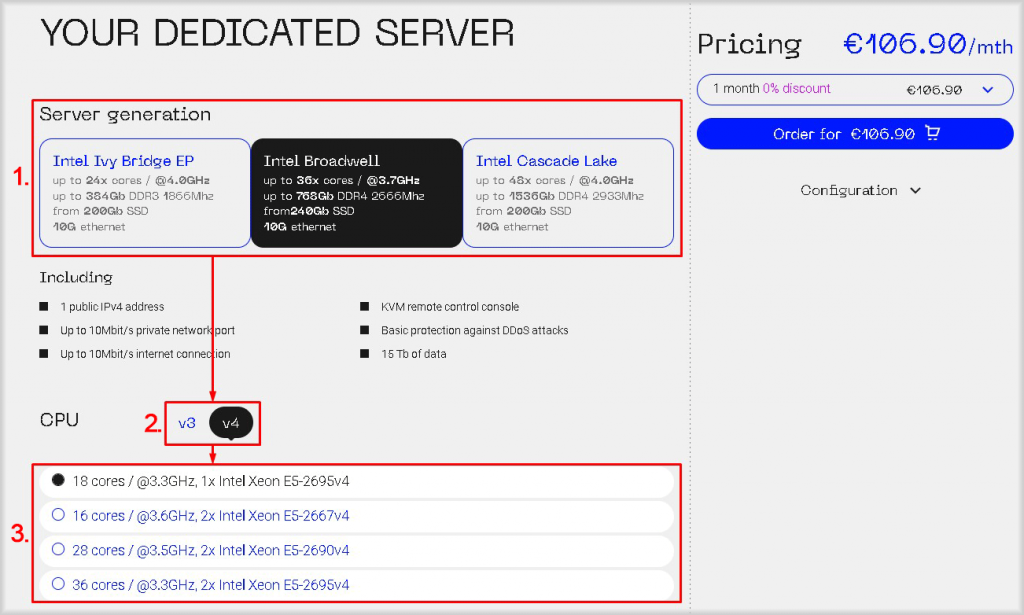
1. From the Server Generation list, select the server generation you wish to use.
The available specifications, options, and prices will vary depending on your selection.
2. In the CPU section, choose the number of processors, processor revision, or category (series) of the processor. The option available for selection changes depending on which Server Generation you select.
3. From the CPU list, select the processor model and the number of processors.
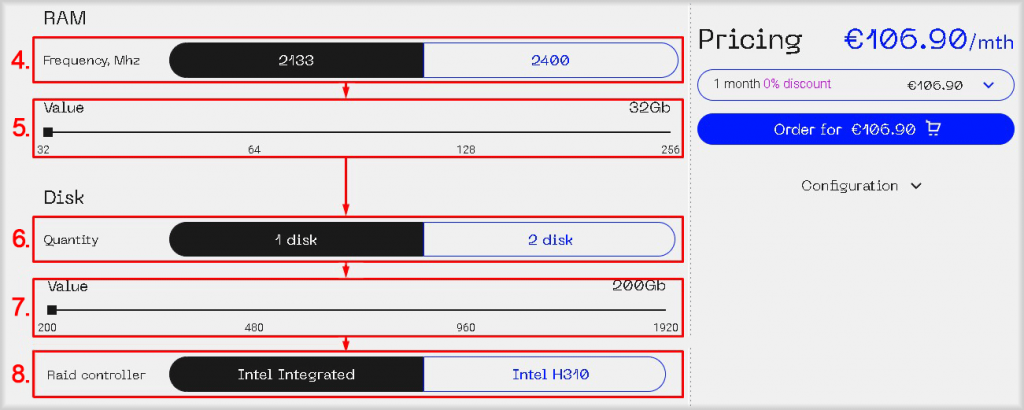
4. Choose the RAM frequency from the Frequency list in the RAM section.
5. Use the Value slider in the RAM section to select the amount of RAM for the server.
6. In the Disk section, select the number of hard discs to be installed in the server from the Quantity list.
7. Use the Value slider in the Disk section to select the capacity of the hard disk(s) for the server.
8. From the Raid controller list, select the type of Raid controller you want.
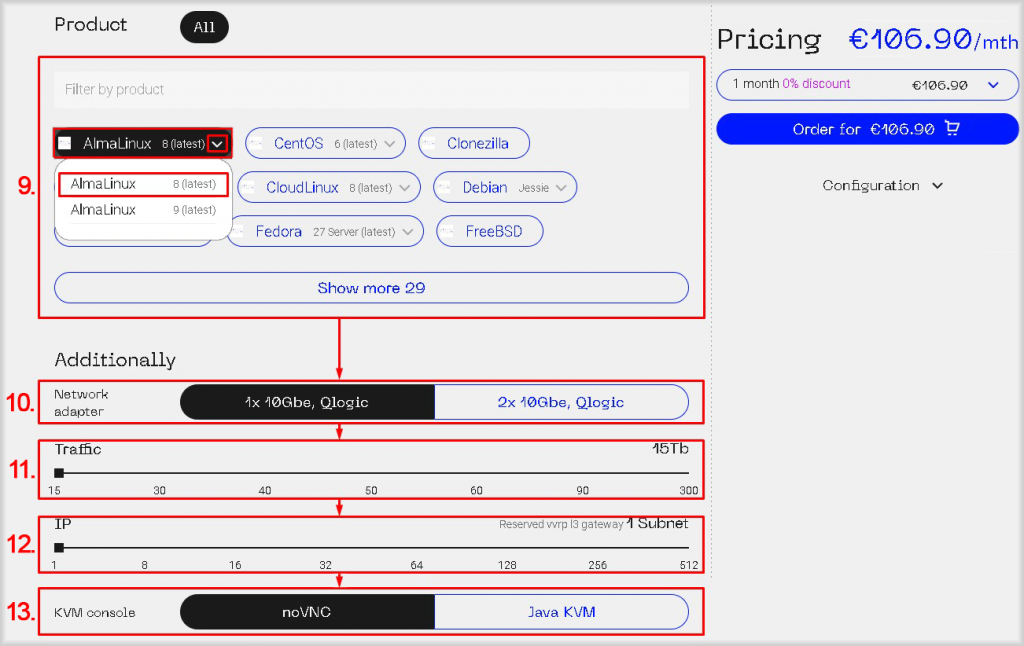
9. In the Product section, select the operating system image.
Click on the name of the operating system you want to select. Then open the version drop-down menu by clicking on the menu icon to the right of the operating system name. In the menu that opens, click on the version of the operating system you want.
To display the full list of operating systems, click Show more... button. You can speed up the search for the required operating system by using a filter by entering the name of the required operating system or part of its name in the Filter by product field.
10. Select the type of network adapter and the number of ports from the Network Adapter list.
11. Select the amount of traffic to be provided during the month by moving the Traffic slider.
Please note that traffic overruns will cost more than pre-paid traffic.
12. Select the number of IP addresses shared with the server by moving the IP slider.
13. Select the type of KVM console: noVMC or Java KVM.
By choosing Java KVM, you get it in addition to noVMC, while retaining the ability to use either of these two consoles if you choose. The Java KVM provides a fast and responsive console, but may require additional security settings due to the use of Java.
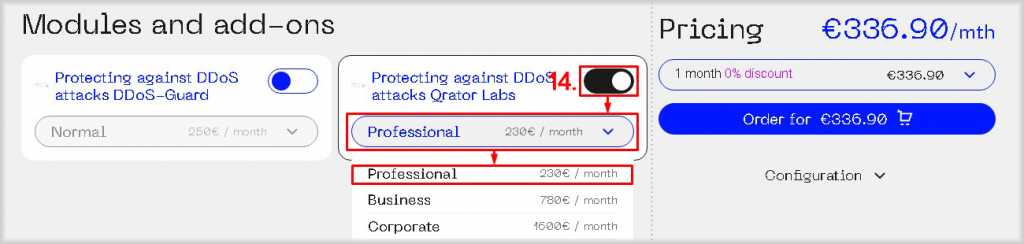
14. In the Modules and add-ons section, select the required add-ons by activating the switch next to the name of the required add-on. Add-ons can have options, these are displayed under the name of the add-on. To select an option, you need to click on the name of the option, and in the drop-down list select the required option.
This way you can select several add-ons you need.
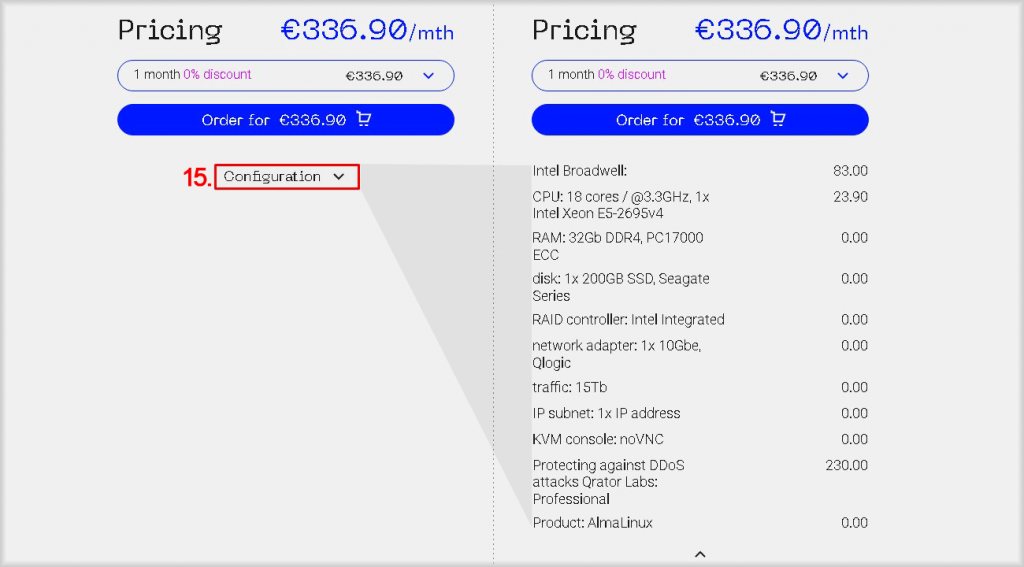
15. Click the Configuration button to display your selected dedicated server configuration before ordering it. Check the configuration and make corrections if any errors are detected when selecting the configuration.
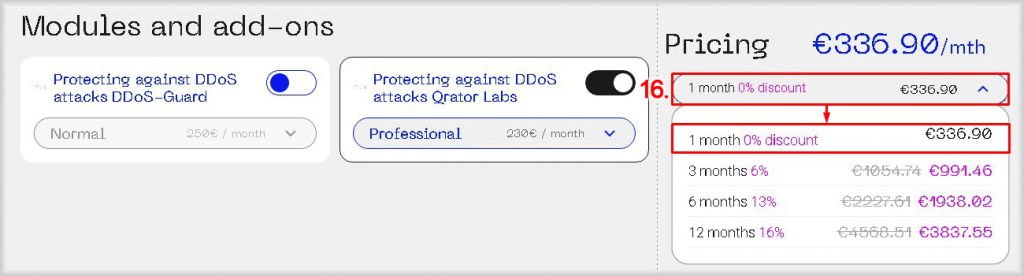
16. Select the length of the payment period by clicking on the relevant field and selecting the length of the payment period that suits you from the drop-down list.
The longer the payment period is selected, the cheaper the cost of one month of using the service will be.
17. Click the Order for... button.
A confirmation of receipt of the order will be sent to your email and you will be redirected to the View Invoice page to pay the invoice for the virtual machine.
If there are sufficient funds in your Peerobyte account to pay for the order, they will be automatically charged and the invoice status will change to Paid. You do not need to pay such invoice and you can proceed directly to step 25 of these instructions.

18. In the View Invoice window that opens, select a preferred way of payment from the Payment Method list: Stripe or Bank Transfer.
19. Proceed to payment:
- а. If you have selected the Stripe payment method, click Pay Now. A Checkout window will open to make payments.
- b. If you have selected the Bank Transfer payment method, click the Download button. A window will open to save the invoice. Save the invoice, pay it, and go directly to step 25 of these instructions.

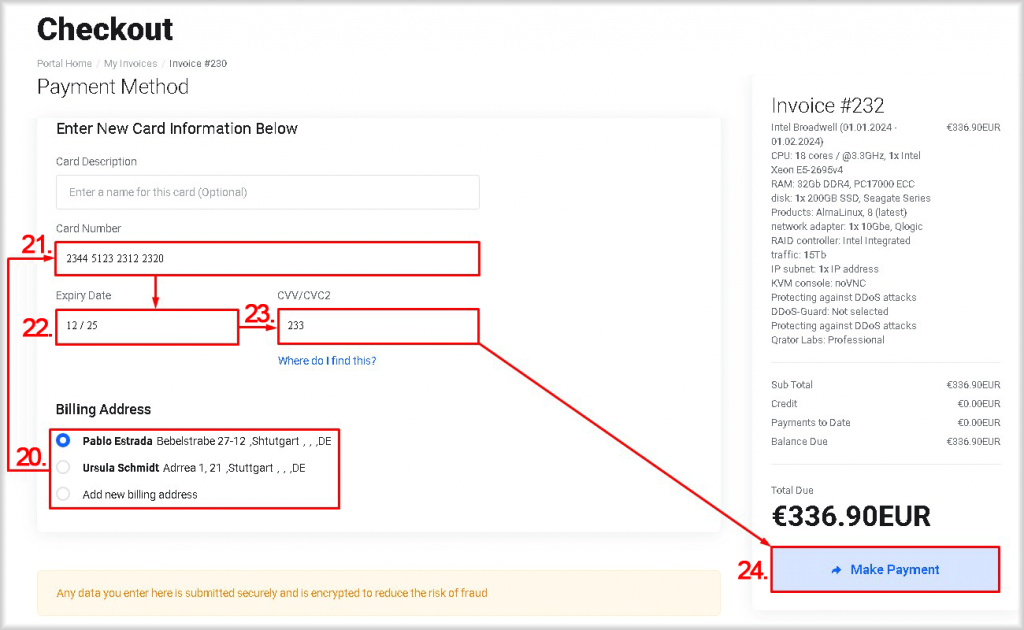
20. On the Checkout page, select a cardholder from the Billing address list or create a new cardholder.
To create a new cardholder, select Add new billing address from the Billing address list and fill in the fields that open: First Name, Last Name, Address 1, Address 2, City, Country, State/Region, Zip Code, Phone Number.
21. Enter the bank card number in the Card Number field.
22. In the Expiry Date field specify the expiry date of the card in MM/YY format.
23. Fill in the CVV/CVC2 field with the corresponding bank card values.
24. Check the correctness of the entered data, correct errors, if any, and press the Make Payment button.
The amount specified in the Total Due field will be debited from your card, and automatic debiting will be activated at the end of each subsequent payment period and until you cancel the use of the dedicated server.
Depending on your bank's security requirements, you may be asked for transaction confirmation, for example, a code received via SMS.
25. Expect to receive an email to the email address specified during account registration that your dedicated server is ready for operation. The server readiness letter will contain login and password for logging in to the operating system of the virtual machine.
If you are ordering products or services from Peerobyte for the first time, you may receive a call from our manager before access is granted.