Cloud Data Storage Control Panel
Here we will review the Cloud Data Storage control panel, the actions that can be performed with it, and the information displayed on it.
Prerequisites
1. You must have a Peerobyte account registered according to the Instructions.
2. You must order a cloud data storage according to the Instructions.
3. You should receive an email from Peerobyte stating that the cloud data storage you ordered is ready for use.
Access to the Control Panel
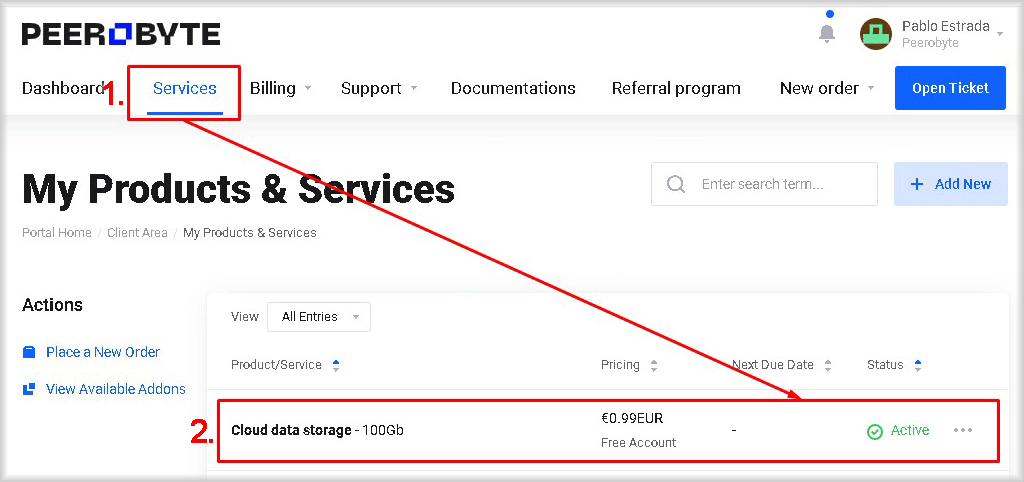
To access the control panel of the cloud data storage, follow these steps:
1. Select the Services menu item.
The My Products & Services window will open.
2. Click on the cloud data storage to which you want to gain control panel access.
The control panel for the cloud data storage will open.
1. Service Management
In the Service Management section, the following tabs are available to you:
Services
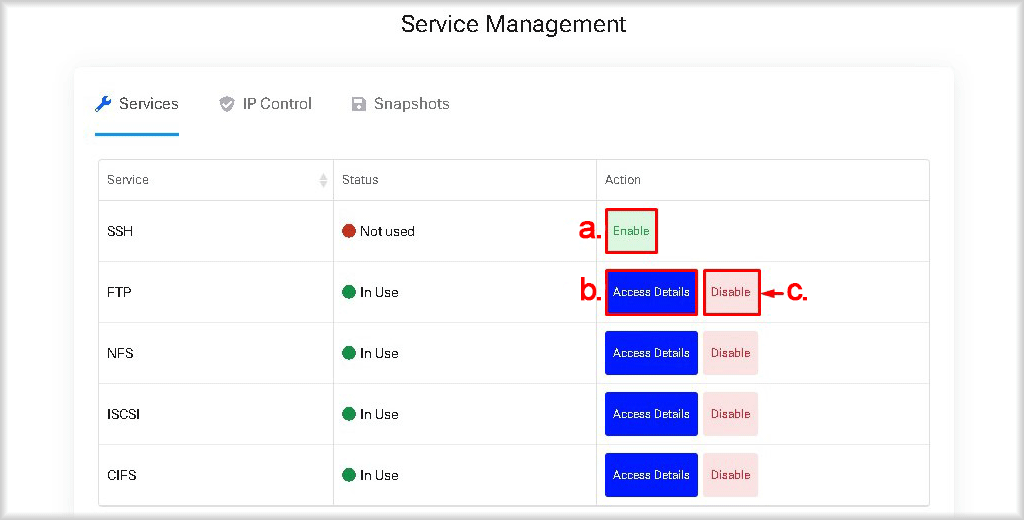
On the Services tab, you can manage the connectivity to your cloud data storage for each available protocol individually and view the connection details for the storage using various protocols.
The following control elements are available:
- a. Enable - Activates the connectivity to your cloud data storage through the selected protocol. This button is available if the protocol has the status Not Used.
- b. Disable - Deactivates the connectivity to your cloud data storage through the selected protocol. This button is available if the protocol has the status In Use.
- c. Access Details - Displays the connection details for accessing the data storage through the selected protocol. This button is available if the protocol has the status In Use.
Instructions for using the connection details to access your cloud data storage are available at the following links:
Connecting to Storage via FTP Protocol;
Connecting to Storage via NFS Protocol;
Connecting to Storage via ISCSI Protocol;
Connecting to Storage via CIFS Protocol.
IP Control
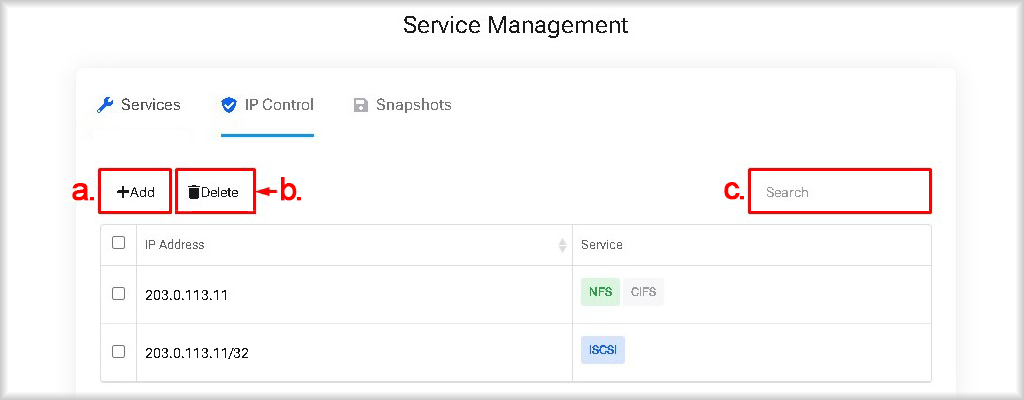
On this tab, you can manage the list of IP addresses allowed to access your cloud data storage for each protocol.
The following control elements are available on the IP Control tab:
- a. +Add - Add an IP address or subnet to the list of allowed addresses for accessing your cloud data storage. When adding an address, you can specify multiple protocols that will be accessible for the added address.
- b. Delete - Remove an IP address or subnet from the list of allowed addresses for all protocols. To delete addresses, check the boxes next to the addresses you want to remove from the allowed list and click the Delete button.
If you remove all addresses from the allowed list for the iSCSI protocol, the connection via this protocol will be accessible to all IP addresses. The value ALL in the IP Address field will indicate that the connection is available to all IP addresses. To completely disable access to the storage for a specific protocol, you can do so on the Services tab. - c. Search - Filter the list of IP addresses or subnets based on specified criteria.
Snapshots
On the Snapshots tab, you can manage the recovery of your cloud data storage. Snapshots are useful for protecting against accidental changes, user errors, and data corruption. They allow you to quickly revert to a previous state of the data if something goes wrong.
However, unlike traditional backups, snapshots depend on the original data storage. This means that if the original storage is physically damaged or the data is completely lost, the snapshots will also be lost. Therefore, to ensure complete data security, it is recommended to use snapshots in combination with traditional backups stored on separate physical media or in a geographically remote location.
The following control elements are available on the Snapshots tab:
- a. +New snapshot - Create a new snapshot of your cloud data storage.
- b. Rollback - Revert your cloud data storage to the state of a previous snapshot.
- c. Delete - Delete a snapshot.
- d. Search - Filter the list of snapshots based on specified criteria.

2. Reconfiguration and Cancellation
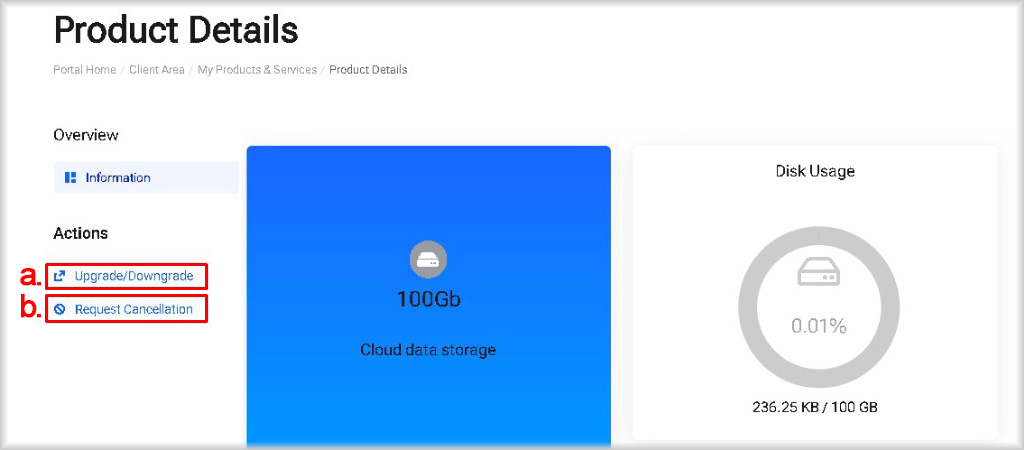
a. Upgrade/Downgrade
You can change the configuration of your cloud data storage by clicking the Upgrade/Downgrade button on the control panel. Through the control panel, you can only increase the storage capacity.
To request a decrease in storage capacity, please submit a ticket to our support team. In your message, specify the desired storage capacity. The storage capacity must be chosen from the existing products, which you can view in the configurator by navigating from the homepage through the menu items Products > Cloud Storage > Cloud Data Storage. Please note that the amount of data currently stored should not exceed 80% of the total storage capacity after the reduction.
After clicking the Upgrade/Downgrade button, a window will open where you need to:
1. Select a new configuration for your cloud data storage by clicking the Choose Product button in the block with the selected configuration.
2. In the confirmation window, select the payment method in the Payment Method field:
- Stripe - payment by credit card;
- Bank Transfer - payment by invoice.
3. Enter a promo code in the Promotional Code field, if you have one.
4. Click the Checkout button to confirm the changes.
If you choose the Stripe payment method, you will be redirected to the payment page to pay by card. If you choose the Bank Transfer method, an invoice will be issued for you to download and pay in order for the configuration changes to take effect.
After changing the configuration of your cloud data storage, the connection details and storage settings will remain unchanged.
Recommendations:
- We recommend planning an increase in storage capacity when usage reaches 80% or more.
- When storage usage reaches 90%, we strongly advise increasing the storage capacity to avoid significant performance degradation, as delays will increase as free space decreases.
b. Request Cancellation
You can cancel the service by clicking the Request Cancellation button on the cloud data storage control panel.
After clicking the Request Cancellation button, a window will open where you need to:
1. In the Briefly Describe your reason for Cancellation field, specify the reason for canceling the service.
2. From the Cancellation Type list, select when the service will be canceled:
- Immediate - immediately;
- End of Billing Period - at the end of the billing period.
3. To confirm your intent to cancel the service, click the Request Cancellation button.
Depending on your choice, the service will be canceled either immediately or at the end of the billing period, and automatic billing for this service will be stopped.
Recommendations:
- Please provide a reason for canceling the service, as this will help us improve our services.
- Make sure you have saved all necessary data before canceling the service, as access to the storage will be terminated after the cancellation.
3. Information
In the cloud data storage control panel, you can find the following information:
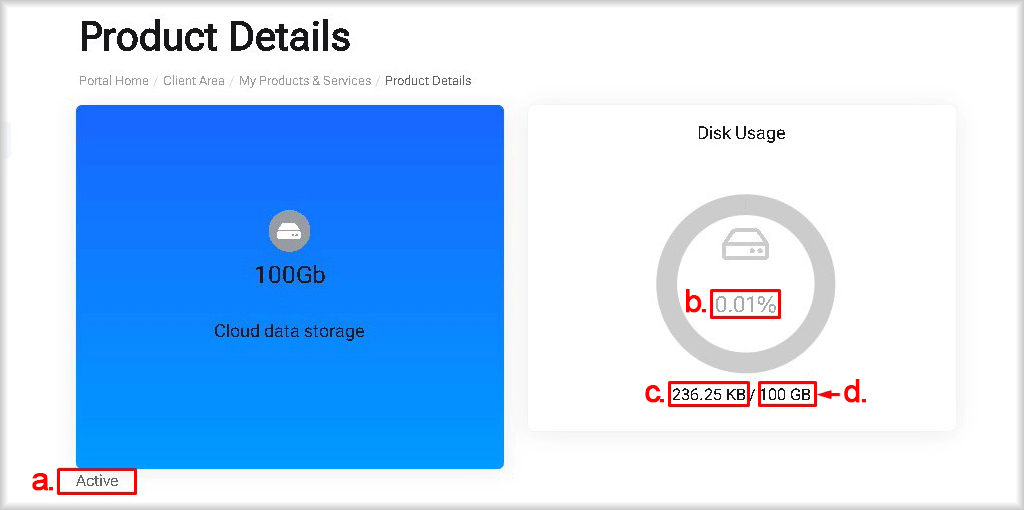
Service State
- a. Service Status - The administrative state of the service:
- Active - The service is fully operational.
- Pending - The service is paused until payment is received or a decision is made by the manager.
- Completed - The provision of service has been completed by mutual agreement.
- Suspended - The provision of service is suspended due to overdue payment. If the payment is overdue for more than 14 days, the data related to the service will be deleted.
- Deleted - The service is deleted. Restoration of the service and data from this state may be possible if you promptly contact our support service through our ticket system.
- Canceled - The service is canceled. Restoration of the service and data from this state may be possible if you promptly contact our support service through our ticket system.
- Fraud - The service is suspended due to suspicions of illegal activity.
- b. Disk Space Usage Percentage - The percentage of storage disk space usage.
- c. Disk Space Used - The amount of used storage disk space.
- d. Total Volume - The total storage volume.
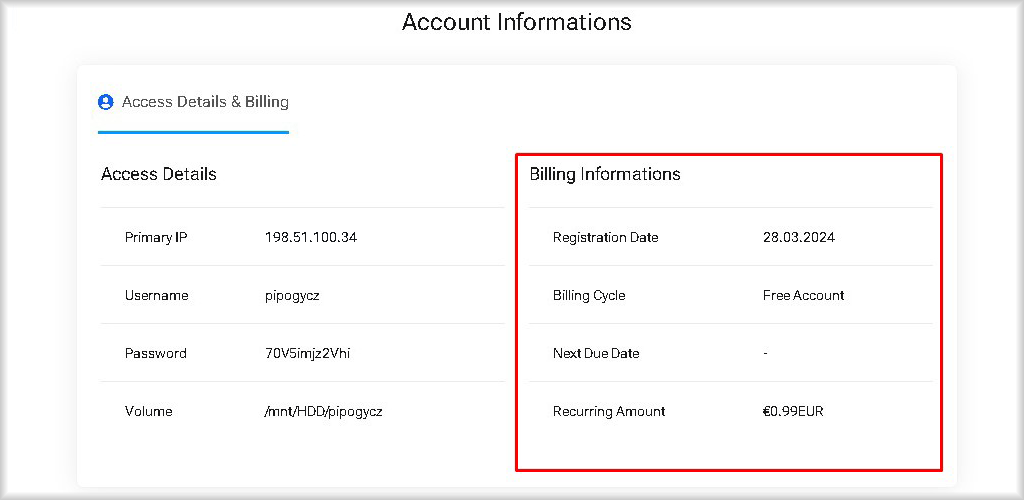
Access Details
Primary IP - The primary IP address for accessing the cloud data storage.
Username - The username used to connect to the cloud data storage.
Password - The password for connecting to the cloud data storage.
Volume - The address of the storage image used when connecting.
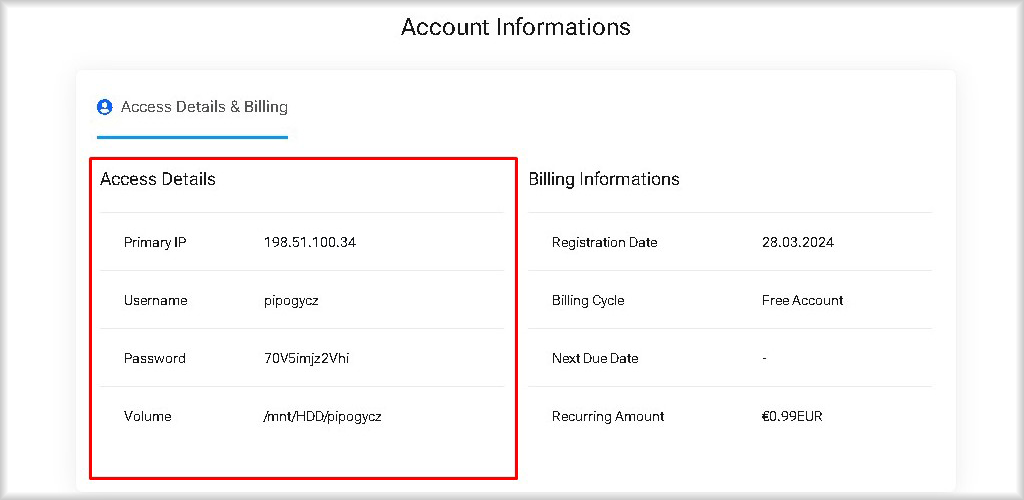
Billing Information
Registration Date - The date when the service began.
Billing Cycle - The billing period you have set.
Next DueDate - The date by which the next period's payment must be made to maintain server functionality.
Recurring Amount - The amount required for the renewal of the dedicated server for the next billing period.