Connecting via Control Panel Console
Here we will show how to connect to a virtual machine or server through the control panel console. Using the noVNC console, our clients can remotely manage their virtual machines and servers. The noVNC console is often used for initial setup and for connecting other, more advanced, remote administration tools.
Prerequisites
1. You must have a registered Peerobyte account. Instructions for registering an account are described in the guide "Creating an Account".
2. You must have a virtual machine or server ordered.
3. You should receive an email from Peerobyte stating that the machine or server you ordered is ready for use.
4. You must log in to the Peerobyte control panel:
- If 2FA (two-factor authentication) is not enabled, follow the instructions in the "Logging into the Control Panel" section.
- If 2FA is enabled, follow the instructions in the "Logging in to the Control Panel with 2FA" section.
5. The virtual machine or server must be in the Running state. If not, start them.
Connection Procedure
1. In the control panel, go to the Services tab.
The My Products and Services list will appear.
2. Click on the virtual machine or server you want to connect to.
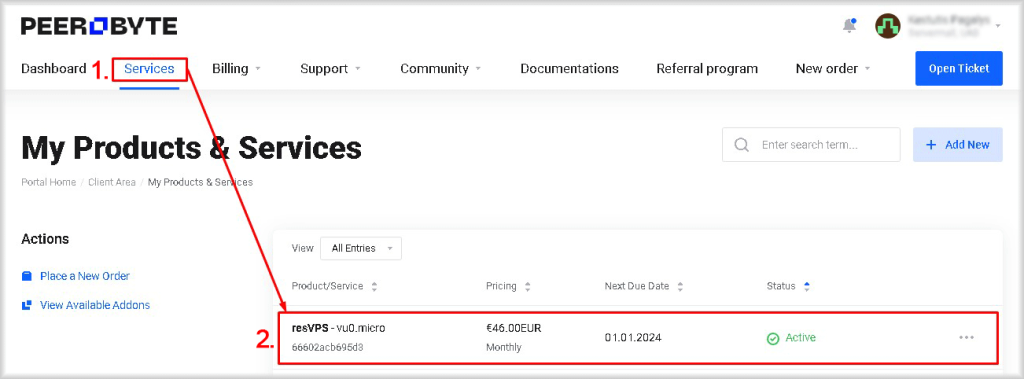
The control panel for your selected service will open.
3. Click on the eye icon in the Password row of the Instance Details section.
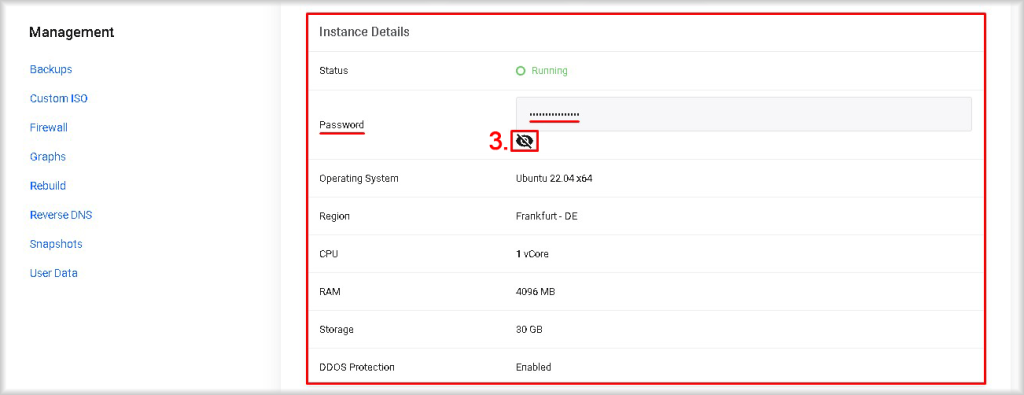
The Password field value will open, which you can use to log into the operating system.
Additionally, the credentials for logging into the operating system of the virtual machine or server are sent to you in the service readiness email.
4. Click on the Console button located in the Service Actions section.

The noVNC console window will open with a prompt to enter the user login and password for the operating system.
If after clicking the Console button the new window does not open, or you see a message that the window is blocked, you need to add the site peerobyte.com to the list of sites where pop-ups are allowed.
5. Log into the operating system as an administrator (superuser), using the password obtained in step 3. The username will be:
- For Windows-based systems: administrator.
- For Linux-based systems: root.