Windows 10/11: Using GUI to Install SSH Client
The latest versions of Windows 10 and Windows 11 include the OpenSSH Client. If your operating system does not contain this package, it can be installed, for example, through the graphical user interface (GUI). We will consider the installation using Windows 10 as an example, but the procedure is largely similar for Windows 11.
Prerequisites
1. Your device must be running Windows 10 (build 1809) or later versions.
2. The account you are using must be part of the "Administrators" group.
Installation Process
1. Press the Start button on the taskbar or the ⊞ Win button on your keyboard.
2. Click on the Settings menu item.

This will open the Windows Settings window.
3. Select the System menu item.

This will open the System window.
4. Go to the Optional Features tab.
5. Click the Add a feature button (View Features for Windows 11) .

This will open the Add an Optional Feature window.
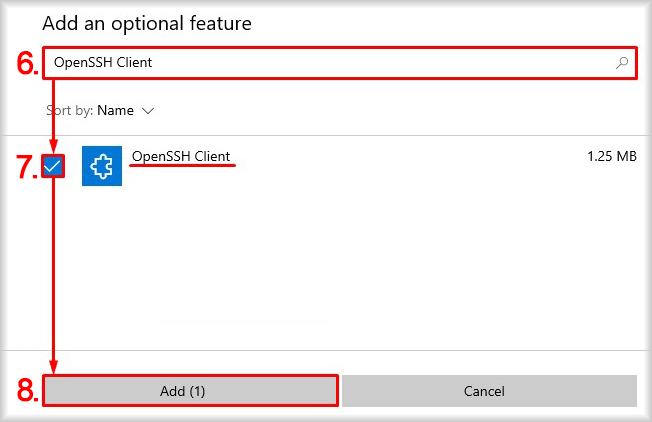
6. In the Find an available optional feature field, type OpenSSH Client.
The extension available for installation will be displayed. If nothing appears, the OpenSSH Client is already installed in your system, and no further installation is required.
7. Check the box next to OpenSSH Client.
8. Press the Add button (Next > Install for Windows 11).
The installation of the OpenSSH Client will begin, and the component's status will be displayed as Installing.
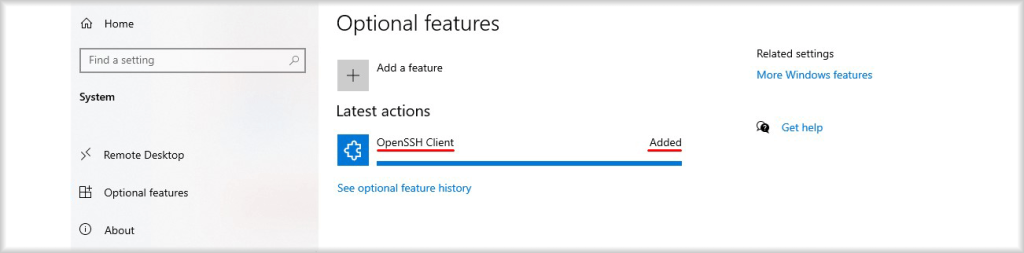
As soon as the status of the OpenSSH Client component changes to Added, the installation is successfully completed. After that, you can proceed to create a key pair as described in the section “Creating Key Pair”.