Virtual Machine Backup Management
Here we will explore actions available to users in terms of backup, including setting up an automatic backup schedule, restoring a virtual machine from a backup, and deleting backups.
To use the automatic backup functionality when ordering a virtual machine, you need to activate the Backups option in the Modules and add-ons section. If this feature was not activated at the time of order, creating a backup will not be possible. However, you can always request the activation of this service by contacting support through the ticket system. After confirmation and payment of the issued invoice, the backup feature will be available.
It is important to consider the following limitations of the backup functionality:
Prerequisites
1. You must have a Peerobyte account registered according to the Instructions.
2. You must order the virtual machine according to the Instructions, selecting the Backups option in the Modules and add-ons section when creating it.
If you did not activate the backup feature when you created the machine, you will need to contact support via our ticket system.
3. You should receive an email from Peerobyte stating that the machine you ordered is ready for use.
4. You must log in to the Peerobyte control panel:
- a. If 2FA (Two-Factor Authentication) is not enabled, follow the Login Instructions.
- b. If 2FA is enabled, follow the Login Instructions for 2FA.
Instructions
Enter to the Backups Management Page
1. Select the Services menu item.
You will be redirected to the My Products & Services page.
2. Click on the virtual machine to which you want to gain control panel access.
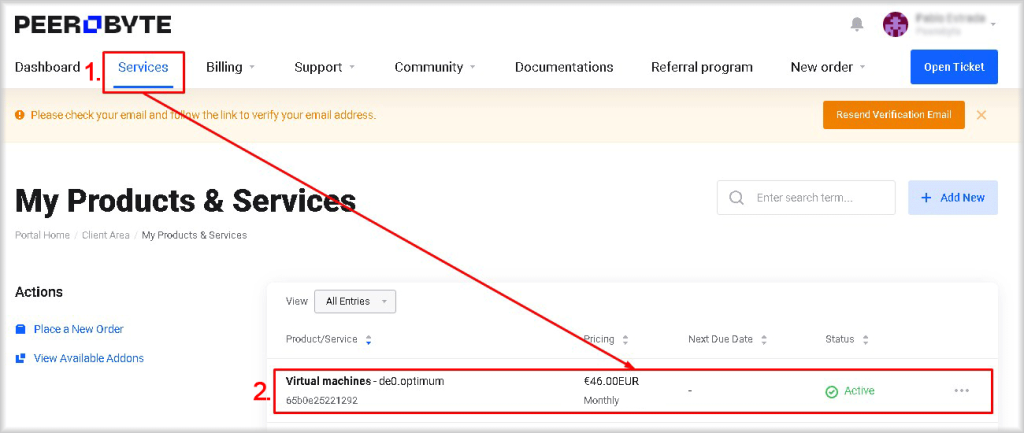
The control panel for the virtual machine will open.
3. On the virtual machine control panel:
- a. Select Backups item from the Management menu.
- b. Or click the Backups button in the Service Management section.

The Backup Management dashboard will open.
Creating a Backup Schedule
To create a backup plan, follow these steps:
1. Click the +Schedule Backup button.
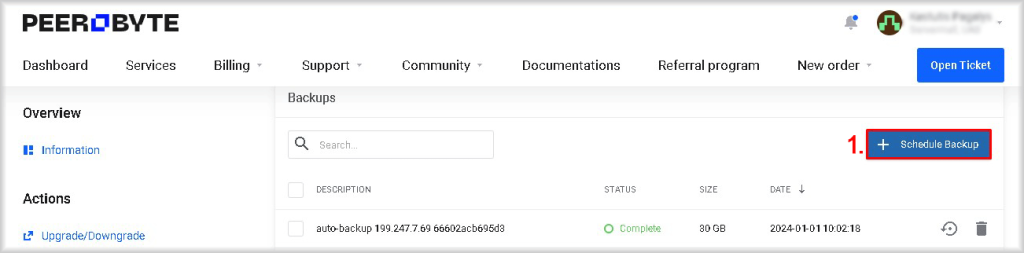
A window will open titled Schedule Backup, where the date of the next backup will be displayed.
2. From the Frequency list, select the backup creation frequency:
- Daily - Daily backups starting from today.
- Every other day - Backups every other day, starting from tomorrow.
- Weekly - Weekly backups starting on the specified day of the week.
- Monthly - Monthly backups starting on the specified date.
3. If you selected Weekly or Monthly from the Frequency list, you will additionally need to specify the day of the week for the backup by selecting it from the Day list, or the date by selecting it from the On list.
4. From the Hour list, choose the time of day when the backup will be created.
Note that the time is specified in UTC, not in the client’s local time, which may be different.
5. Click the Confirm button.
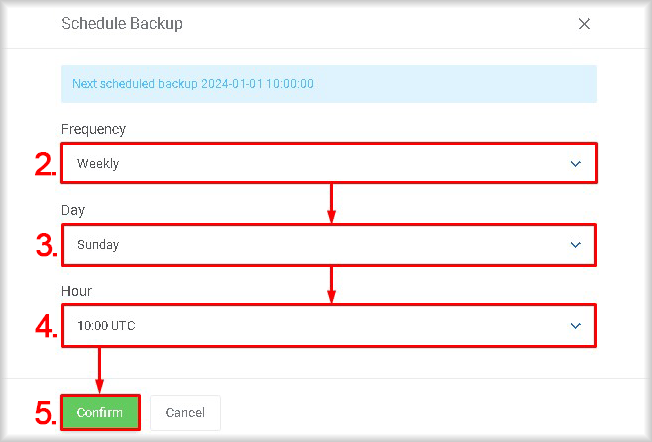
A message will appear: “Changes have been saved successfully”, and the backup schedule will be updated.
Deleting Backups
To delete a backup, follow the steps below:
1. In the Backups table, in the row with the backup you want to delete, click the trash can icon (Delete).
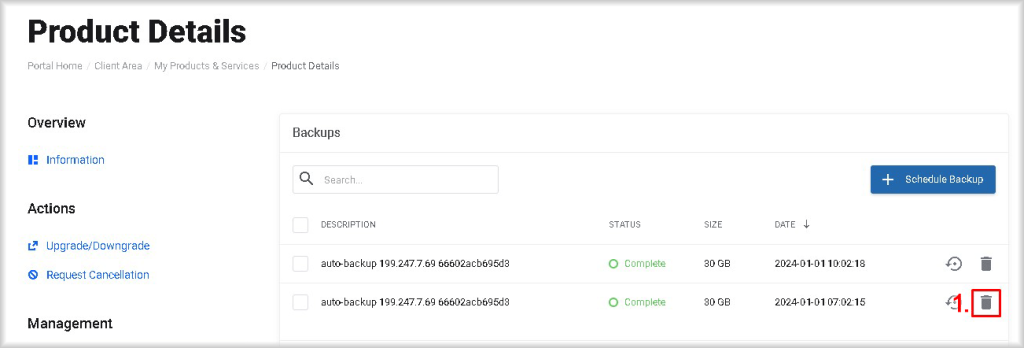
The Delete Backup window will open.
2. Click Confirm to confirm your intention to delete the selected backup.
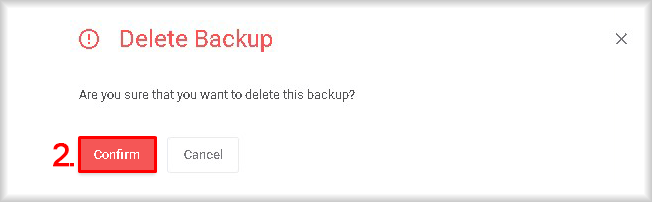
The message "The backup has been deleted successfully" will be displayed and the backup you selected will be deleted.
Restoring a Virtual Machine from Backup
You can restore the state of a virtual machine from a backup at any time. Note that while restoring the virtual machine, its current state and all data will be lost.
To restore a virtual machine from a backup, perform the following steps:
1. Select the image from the Backups table from which you want to restore the virtual machine and in the row with this image click the clock icon (Restore).
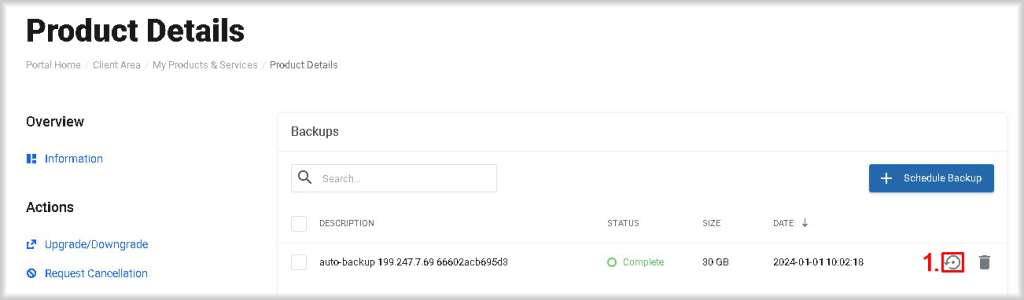
The Restore Backup window will open.
2. Confirm your intention to restore the state of the virtual machine from the backup by clicking Confirm.
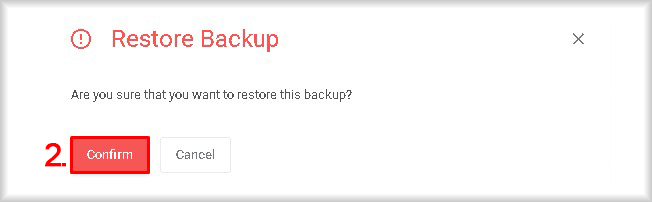
The message "The backup has been restored successfully" will be displayed and the virtual machine will be restored from the backup you selected.