How to order cloud infrastructure
This guide describes how to order Peerobyte cloud infrastructure.
I. Make sure the prerequisites are met
To order cloud infrastructure, the following prerequisites must be met:
- You must have an account in the Peerobyte client area. You can find out how to register an account in the "Creating an Account" guide.
- You must be able to pay for the service using one of the following available methods: bank card, bank transfer, PayPal, or SEPA.
- You must sign in to your account on the Peerobyte website:
- If 2FA (two-factor authentication) is not enabled, follow the "Signing in to the Control Panel" guide.
- If 2FA is enabled, follow the "2FA Signing in to the Control Panel" guide.
II. Go to the cloud infrastructure configurator
You can go to the cloud infrastructure configurator in the following ways:
From "Dashboard"
- Go to the "Dashboard" page by selecting the relevant item in the main menu.
- In the "Place a New Order" section, find the "Cloud Infrastructure" block and click the "Provision Now" button.
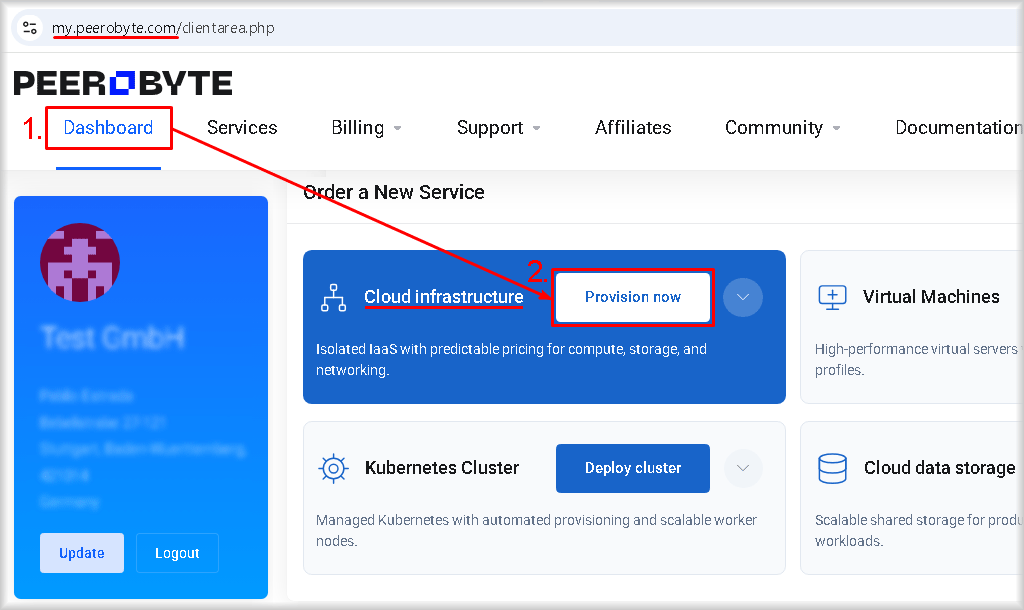
You will be taken to the "Cloud Infrastructure" configurator page.
From the main menu
- Select the "New order" item from the main menu.
The list of products available to order opens. - Select "Cloud Infrastructure".
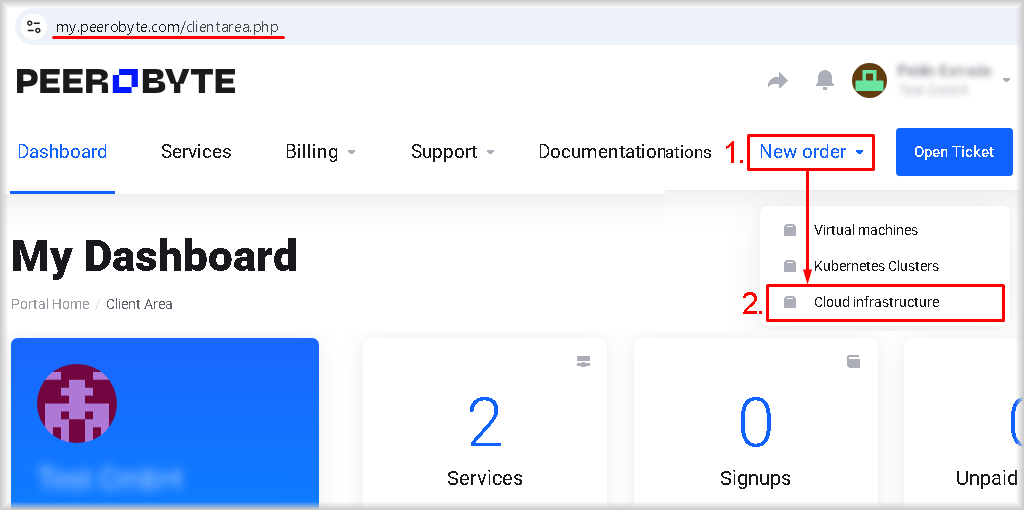
You will be taken to the "Cloud Infrastructure" configurator page.
III. Select the cloud infrastructure configuration
When ordering cloud infrastructure, you specify the limits (quotas) of the resources available to your project. You will be charged for all of these resources, whether they are actually used or not. Any later decrease or increase of the limits (quotas) is handled through Peerobyte Support.
- Specify the compute resources.
Move the "Cores" and "RAM" sliders to set the number of virtual cores (pcs) and the amount of RAM (GB) required for your project.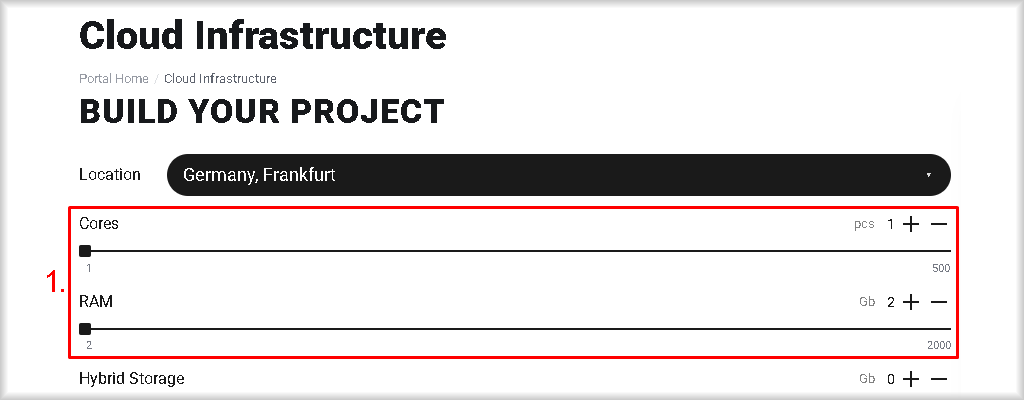
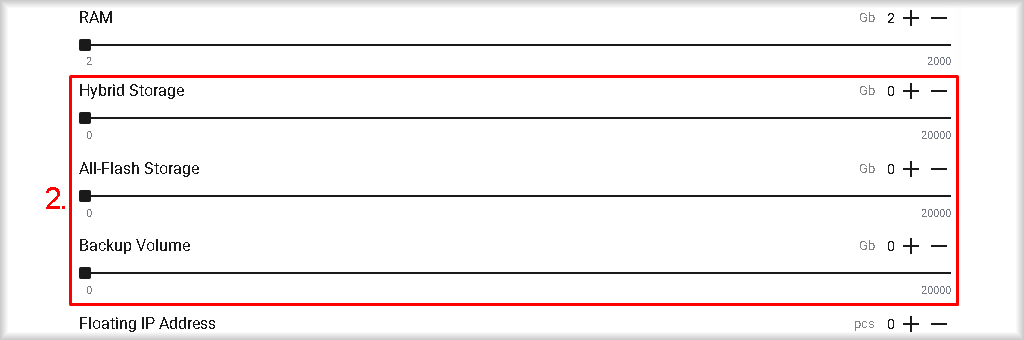
- Define the storage capacity.
Move the sliders to set the data storage volumes:- Hybrid Storage - combines fast SSDs and high-capacity HDDs. Intelligent caching provides a balance between speed and storage cost. This is the best choice when you need a large amount of disk space for a range of tasks without overpaying for pure performance.
- All-Flash Storage - NVMe SSD-based storage that provides high speed and fast response under heavy loads and when working with demanding databases. Because it has no mechanical parts, it provides consistently low latency and high reliability during intensive use.
- Backup Volume - a dedicated area for storing backups. It can be used with both Hybrid Storage and All-Flash Storage.
- Set the quotas for floating IPs.
Move the "Floating IP Address" slider to set the number of floating IPv4 addresses your project will need for internet access.
- Confirm the order.
Check that the selected cloud infrastructure configuration is correct and, if necessary, make changes. Then click the "Order for..." button.
You can reduce the average monthly cost of the service if you choose a payment period of 3, 6, or 12 months (the list is available above the "Order for..." button) and pay for it upfront.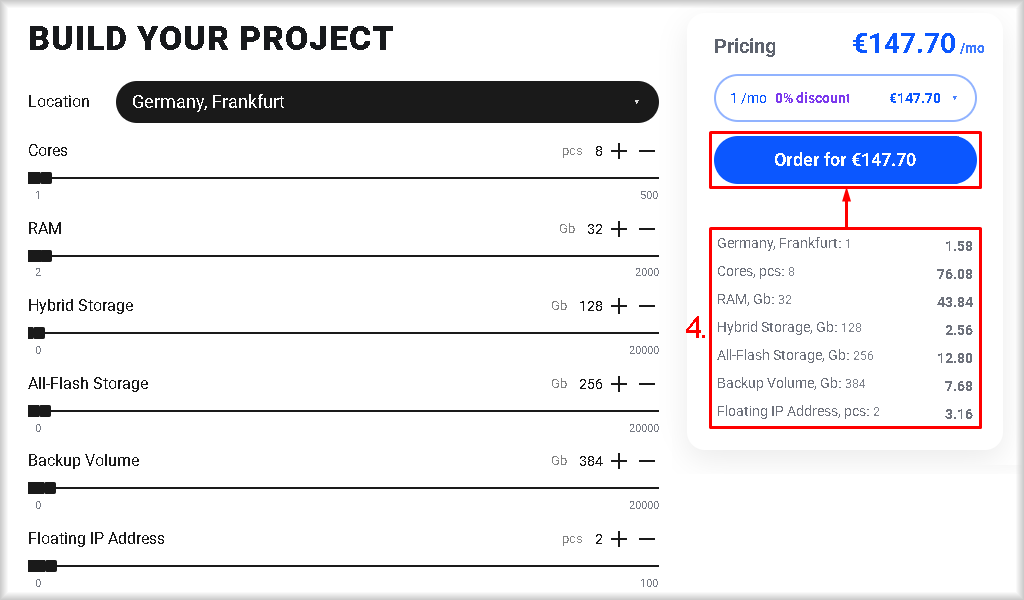
If your Peerobyte account balance has enough funds to pay for the order, the specified amount will be charged automatically after you click the "Order for..." button, and you will be redirected to the Peerobyte services control panel.
If the account balance does not have enough funds, you will be redirected to the "Checkout" page to pay the invoice.
IV. Pay for the order
Payment by bank card
On the "Checkout" page, fill in the "Card Number", "Expiry Date", and "CVV/CVC2" fields with your bank card details, then click the "Make payment" button.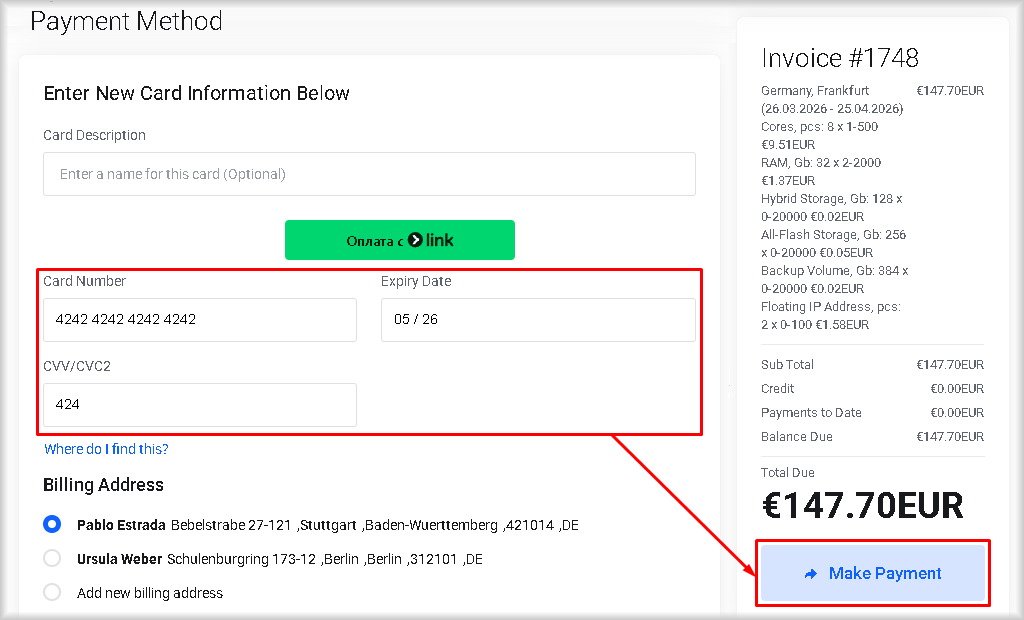
The amount shown in the "Total Due" field will be charged to your card. Automatic charging will also be enabled at the end of each subsequent payment period and will continue until you stop using the service. You will then be redirected to the Peerobyte services control panel, and an email confirming the successful order of the cloud infrastructure will be sent to you.
Payment by bank transfer, PayPal, or SEPA
You can also pay for cloud infrastructure by bank transfer, PayPal, or SEPA. To choose another payment method, open the "My Invoices" section and go to the unpaid invoice.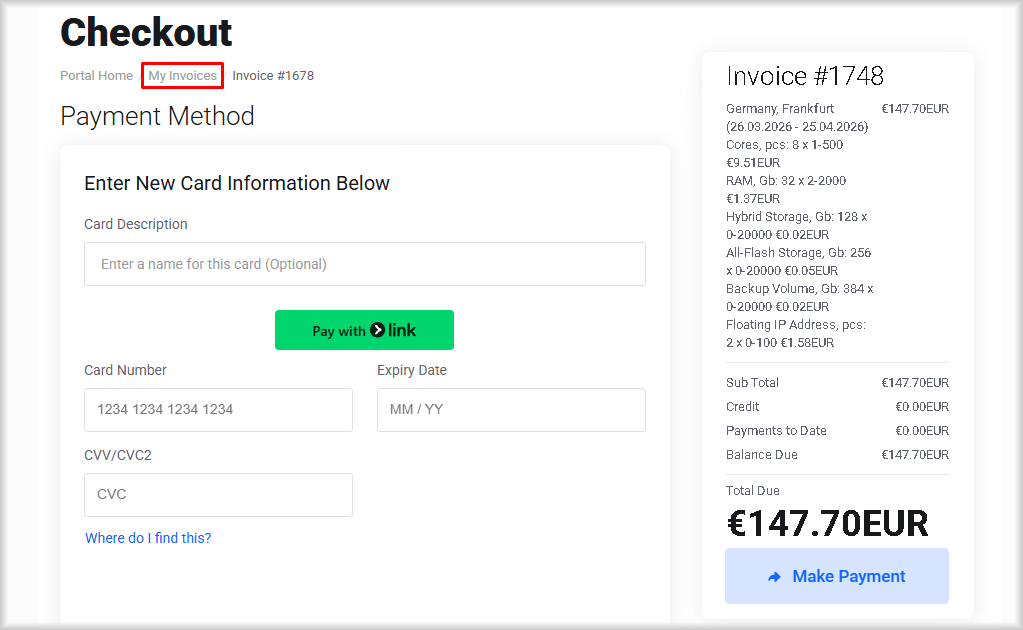
Depending on the selected payment method:
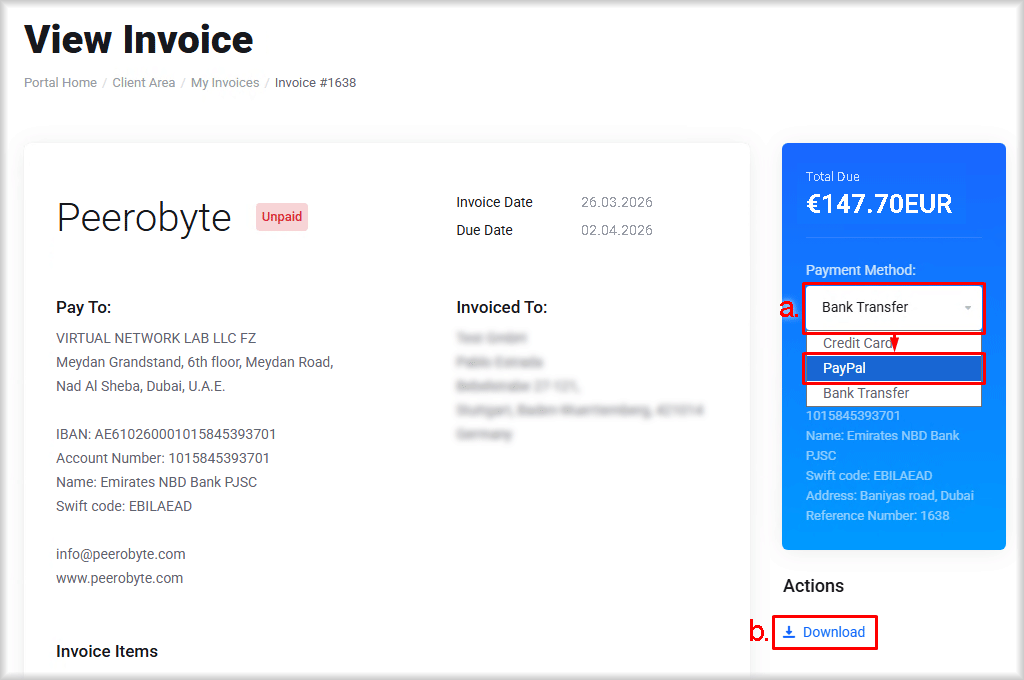
- PayPal or SEPA - From the "Payment Method" list, select "PayPal" and click the "Pay Now" button. Then, in the window that opens, select "Pay with PayPal" or "Pay with SEPA".
- Bank Transfer - click "Download", save the invoice, and pay it by bank transfer.
V. What next?
After the cloud infrastructure reaches the "Active" status, you will be able to:
- Sign in to the cloud infrastructure control panel.
The procedure for signing in to the cloud infrastructure control panel is described in the "Logging in to the Cloud Infrastructure Control Panel" guide. - Start deploying the cloud infrastructure.
Deploy the basic infrastructure in the Peerobyte cloud by using the cloud infrastructure control panel. This is described in the "Quick Start in Cloud Infrastructure" guide. - Use automation and orchestration tools when working with cloud infrastructure.
To automate work with cloud infrastructure, you can use Command Line Interface (CLI) and Terraform, and for container workload orchestration, use Kubernetes.